iOrgSoft iPod Video Converter is definitely a good choice for you to convert videos to iPod video files on the latest iPod Nano, iPod Touch,iPod Video and iPod Classic. Being powerful but easy to use, it enables you to convert all popular audio and video files, such as AVI, MPEG, WMV, MOV, MP4, VOB, DivX, XviD and MP3 ect. iOrgSoft iPod Video Converter has an amazing speed and perfect quality. No need any previous study, you will use it smoothly.
Step 1: Add Video File
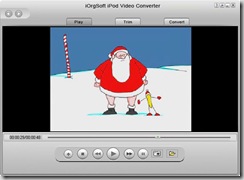
Click the add icon, the program will let you browse your hard disc. First you should select the format,then the corresponsive files will be found and add the file you want to convert. Click the play button to preview your excellent video. When your video is playing, you can capture the excellent pictures by clicking the camera icon. It will automatically save your favorite video pictures on your computer as jpeg file. You can find the photos by opening the folder on the right of camera icon.
Step 2: Video Trimming
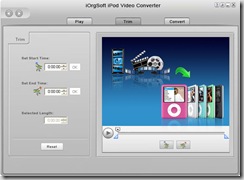
Click Trim in the main menu to enter the trim window. Click the start icon to open movie trimming window and do as follows to capture a clip from the selected file:
set start time: You can set starting time by clicking the up and down button in the Set Start Time box and click OK. Or you could click the first icon under the preview window and the start time will be shown in the Set Start Time box automatically.
set end time: You can set ending time by clicking the up and down button in the Set End Time box and click OK. Or you could click the second icon under the preview window and the end time will be shown in the Set End Time box automatically.
After you set the end time, the length of the captured clip will be shown in the selected length box for your reference.
Step three: Video Conversion
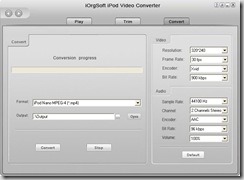
Click Convert in the main menu and come to the convert window, set video effect.
Video: Set video encoding settings by selecting a resolution, a frame rate and a bit rate and encoder as you need.
Audio: Set audio encoding settings by selecting a sample rate, an audio channel, a bit rate, an audio volume and encoder as required.
format: Set an output format for the selected file.
Output: Click the first icon to specify a folder on your computer to save the converted file. You can also open the output folder by clicking the Open button.
When you finish all the necessary settings, you can click the Convert icon at the bottom of the window to start converting the file. Click the Stop button to cancel the process as required. You can view the conversion progress from the progress bar.


0 comments:
Post a Comment